Hello!
A short time ago I blogged about my Blue Linen Kirtle and I finished that post with a lament about how I am lacking in awls. I haven’t got an awl yet so I haven’t continued work on the Blue Kirtle. However, I’ve still been sewing a lot and I’ve made good progress with my next kirtle.
UPDATE: Since writing this post I have, in fact, received my awl, but I've been sewing much slower so this post is basically still up-to-date.
Kirtle #2 is made using the same pattern that Rosie helped me with. However, it has a very different structure from the Blue Kirtle because it is front-lacing instead of side-lacing. It’s also cream-coloured. The top fabric is from Fabrics-store.com and it’s IL019 5.3 oz/yd2 in a colour called Krista. For the lining I used the same white linen that I used in my Blue Kirtle. The Cream Kirtle is also entirely hand-sewn using linen thread, except for the basting stitch where I used the same cheap cotton.
My process for the Cream Kirtle started in the same way that the process for the Blue Kirtle started. I cut out the pieces in interlining fabric. This time I used two layers of linen and one layer of the grey horsehair stuff. I didn’t really want it to be any thicker but because the cream linen is so light you can see the grey horsehair stuff through it. I didn’t have that problem with the Blue Kirtle because you can’t see the grey through the deep blue. Using two layers of the heavy white linen means that you can’t see the grey stuff through the cream stuff. Here’s a picture of those three layers:

As with the Blue Kirtle, my next step was to stitch the layers of interlining together. I used running stitch. Next step: cutting out the top fabric. I cut out the lining fabric at the same time to make sure it was the same size and shape as the top fabric pieces. I was pretty careful at this step because I think that wrong cutting-out of my lining fabric contributed to the shoulder-lumping on the Blue Kirtle. I also used a slightly smaller seam allowance this time and I didn’t have to trim any off. After all the cutting-out I used a big running stitch to baste the top fabric to the interlining.
Picture for proof:

And then, herringbone stitch! I remembered to take pictures of my herringbone stitch this time so you can have a look at how I did.
Along a straight edge:
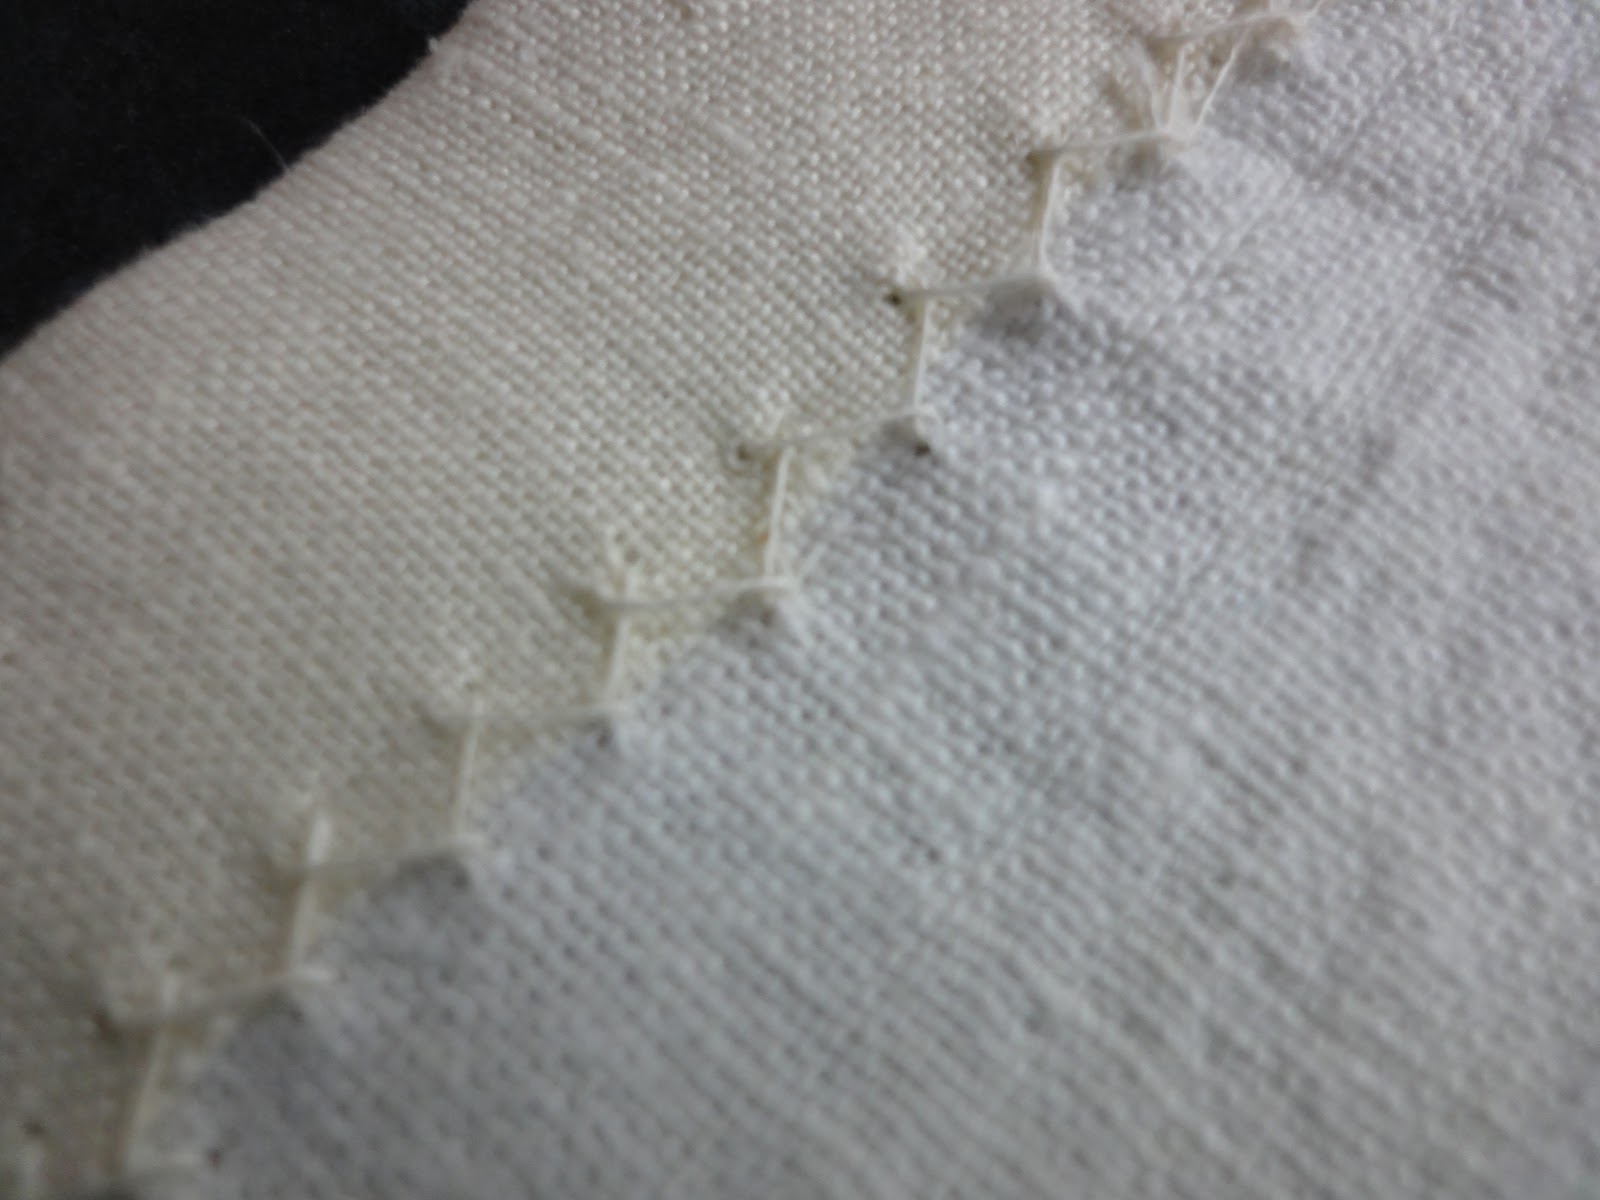
Around a curve:

The next step after the herringbone stitching (which took forever, it’s such a slow part of the process) was to sew the seams. There were many more seams on the Cream Kirtle than there were on the Blue Kirtle. I sewed the side seams first and then the shoulder seams. I don’t really think that the order would have made a difference, I just did it in that order because I thought it would be better to sew the longer seams first. I used back-stitch because it’s good for seams. After I sewed the four seams (two side-seams, two shoulder-seams) on the top fabric, I sewed those same seams on the lining fabric.
Next, I pinned the lining fabric into the bodice. I started by matching the seams and then I tucked the seam allowance all under and pinned that down. For around the armholes I did the same thing, using little snips to be able to fold it in neatly. Interestingly, I was watching the “Jersey Shore” episode of Bones whilst doing this. I don’t know why I remember that. Anyway, I then sewed down the lining using slip-stitch. Here are a couple of pictures of the lining all sewed down:


I’m pretty happy with how the bodice has turned out so far. It doesn’t have any weird lumping that I’ve noticed yet and I think my sewing was mostly quite neat. The only part of the bodice that I’m not as happy with is the back panel, which is a V-shape. I’m not happy with it because it turned out not-very-pointy. I tried to make it pointy but it didn’t turn out very pointy and I don’t know how to increase the pointedness. Here’s a picture of how it turned out:

*sigh* Oh well, it will do.
I’ve done a bit more work on this dress but I haven’t taken pictures yet, so I’m going to keep this blog post short and sweet and leave it here.
The rest of what I’ve done is: cut out the skirt pieces, do the pleating, attach the skirt, sew the side-seams.
What I have left to do is: a bunch of finishing, remove basting stitches, a bunch of lacing-holes.
UPDATE: I may have done this stuff already (but not on the blue dress yet).
Hopefully by the next time I blog I’ll have completely finished both dresses! I should be able to sum them up in one post (with pictures)!
Thanks for reading :)
♥Nancy♬
1 comment:
Hello! Pointedness is very difficult to achieve for a single panel (like you've used for the back). Don't stress, it'll look just fine, but next time you could try cutting the back from two pieces (fold your pattern in half and cut two pieces, leaving a seam allowance on the centre-back like you'd do for the sides). It's an extra seam but it makes for a more distinct point. Otherwise: fabulous!
Post a Comment